How to Make a Mini Sourdough Starter From Scratch (and Take It With You When You Travel)
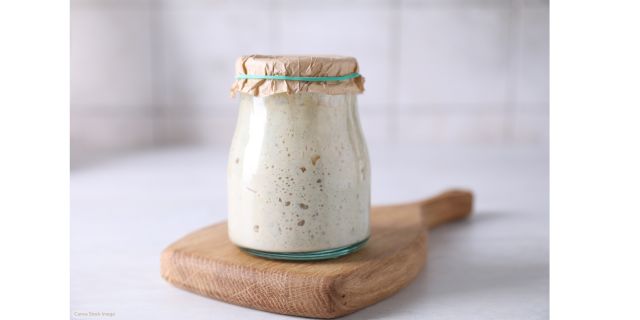
We’ve been traveling full time for a couple of years now, and lately I’ve started getting the itch to bake again. Back when we were settled in one place, sourdough was part of our regular routine – especially sourdough English muffins and simple loaves of no-knead bread.
At home, I kept a large sourdough starter alive for years. It lived on the counter (and sometimes the fridge), got fed on a schedule, and felt like the high-maintenance sourdough starter we all know and love.
Full-time travel changed all of that.

Finding a sourdough starter while traveling across the world – let alone maintaining one – felt unrealistic. We were moving often, working with unfamiliar kitchens, and trying not to add another thing that needed constant attention. For a long time, sourdough just felt out of reach.
That changed once I learned about mini starters and dehydrating starters and stopped thinking in terms of traditional sourdough advice and started adapting it to how we actually live now.
This is the method I now use in small kitchens, with flexible schedules, and while moving from place to place. I keep the starter small, feed it based on how it looks, smells and feels (rather than exact measurements), and dry it completely when it’s time to travel.
If you can spare a small jelly jar and a soup spoon, you can keep a sourdough starter alive almost anywhere.
What You Need
Nothing fancy. If you’ve got these, you’re good.
- A small glass jar (a re-purposed jelly-jar size works well)
- Flour (all-purpose is fine; whole wheat or rye can help in the beginning if you have it)
- Water (room temperature)
- A soup-size spoon

Day 1: Start the Starter
I start small on purpose.
- Add two soup spoons of flour to the jar.
- Add water a little at a time, mixing as you go.
You’re looking for a thick paste:
- Smooth and spoonable
- Holds its shape
- Similar to peanut butter or soft mashed potatoes
Scrape down the sides of the jar, loosely cover it (placing the lid on top of the jar without tightening it is fine), and leave it at room temperature, out of direct sunlight.
Then walk away. This part doesn’t need babysitting.
Day 2: Discard and Feed
This is where sourdough starts teaching patience — and where most people start asking questions.
- Pour out about half of the mixture. (Keep reading to learn why we do this)
- Add enough flour so there’s slightly more flour than starter left in the jar.
- Add water slowly and mix well, until you’re back to that same thick paste consistency.
Mix well, scrape down the sides, loosely cover, and leave it alone again.
Note: Timing isn’t as rigid as you may have been led to believe… seriously… sometime during the day, tend to your starter…. it doesn’t have to be the exact same time every day.
What “Enough Flour” Looks Like
I don’t measure this precisely. Instead, I go by proportion.
After discarding, look at how much starter is left in the jar. I add flour until it looks like a bit more than the starter still in the jar – then adjust with water until it’s thick, smooth, and spoonable again.
If you prefer thinking in utensils, this often works out to about two or three soup spoons of flour – but the proportion (slightly more new flour than old starter) and consistency matters more than the spoon count.
Why We Throw Half of It Away
Discarding isn’t about waste – it’s about balance.
As the starter ferments, the wild yeast and bacteria multiply. If you keep feeding without removing any, a few things happen:
- The jar fills up quickly
- The microbes run out of fresh food
- The starter becomes acidic and sluggish
By removing about half, you’re:
- Keeping the size manageable
- Giving the remaining yeast fresh flour to feed on
- Encouraging a stronger, more stable starter
Keeping it mini means the discard stays small, which makes the whole process easier to live with — especially when you’re not settled in one place.
Can You Safely Use Discarded Starter?
Discard from the first few days: No
During roughly days 1–4, the starter is still sorting itself out. The microbial balance isn’t stable yet, and while it’s usually not dangerous, it’s unpredictable and doesn’t taste good. We throw early discard away without guilt.
Discard from an established starter: Yes
Once the starter smells clean, bubbles consistently, and responds reliably to feedings, discard is just unfed starter. Sourdough is a naturally acidic fermentation, which helps discourage harmful bacteria once the starter is established. At that point, it’s predictable and safe to cook with.
A good rule of thumb we use:
If we’d be comfortable baking with the starter itself, we’re comfortable cooking with the discard.
Discard works best in recipes that don’t rely on it for rise — pancakes, crackers, flatbreads, and quick breads.
Days 3 – 6 and Beyond: Same Routine, Subtle Changes
From day 3 onward, nothing new is required. What changes isn’t what you do — it’s how the starter responds.
You’ll continue the same daily routine, but you may start to notice:
- More bubbles throughout the jar
- Some rise after feeding (even if it’s modest)
- The smell shifting from raw flour to something tangy and mildly sour
Some starters are ready to use around day five or six. Others take closer to a week or more. Both are completely normal.
There’s no specific day when a starter suddenly “levels up.” What matters is how it behaves, not what day you’re on.
As long as it’s bubbling, responding to feedings, and gradually becoming more predictable, you’re on the right track.

Let Your Environment Set the Pace
Every kitchen has its own personality, especially when you’re moving from place to place. Different flour brands, humidity levels, and room temperatures all affect how a starter behaves.
We keep things simple by adjusting the starter when we’re feeding it.
At feeding time:
- If the starter looks runny, we add a little more flour with the feed.
- If it looks stiff or dry, we add water a few drops at a time with the feed.
We don’t adjust it throughout the day, and we don’t worry about small changes between feedings. Once a day (or once a week if it’s refrigerated), we take a look, make any needed adjustment, mix, and move on.
A few general patterns we’ve noticed:
- Cooler rooms slow things down.
- Warmer rooms speed things up.
- Different flours absorb water differently.
What matters most is bringing the starter back to that same thick, spoonable paste each time you feed it. Consistency over time matters far more than reacting to every small change.
When Your Starter Smells… Not Great
At some point in the first few days, your starter may smell downright unpleasant. We’re talking gym socks, old cheese, or something that makes you instinctively lean back from the jar.
That’s normal.
In the early stages, a mix of different bacteria shows up before the balance shifts toward the yeast and bacteria you actually want. During that phase, the smells can be strong and not particularly appealing.
Trust the Process
As long as you don’t see mold, this is usually just part of the process.
- Sour, funky, or sharp smells are normal early on
- Strong odors often peak around days 2–4
- The smell usually mellows as the starter stabilizes
We’ve learned not to panic just because it smells bad. Most starters clean themselves up with regular feeding and time.
When to Keep Going – and When to Stop
Here’s the simple rule we follow:
- No visible mold? Keep going.
- Visible mold? Throw it out and start over.
Mold looks different from bubbles or streaks. Watch for:
- Fuzzy patches
- Green, black, pink, or orange spots
- Anything that looks dry, powdery, or hairy
If you see mold, it’s not worth trying to save. Just wash the jar and start again.
If the starter smells unpleasant but looks bubbly and active, keep feeding it. In most cases, the smell improves on its own.
What a “Healthy” Sourdough Starter Eventually Smells Like
Once the starter settles in, the smell changes.
Instead of foul or sharp, it becomes:
- Mildly sour
- Clean
- A little yeasty or fruity
That shift is often one of the first signs that your starter is moving in the right direction — even before it starts rising much.
When Your Mini Sourdough Starter Is Ready to Bake With
Once your mini starter is active, the big question is always the same: Is this good enough to use yet?
We don’t overcomplicate this. Your starter doesn’t need to be dramatic — it just needs to be reliably alive… even if it doesn’t double every time..
It’s ready when it:
- Bubbles throughout, not just on the surface
- Rises noticeably after feeding (even if it doesn’t double)
- Smells clean, mildly sour, and not like raw flour
You may see advice that says to start feeding twice a day around day six or seven. That’s not a requirement — it’s something people do when a starter is rising and falling within a few hours (depending on your environment) and running out of food between feedings.
If your starter is peaking and collapsing well before your next daily feed, switching to twice-daily feedings for a day or two can help strengthen it. If it’s still slow or inconsistent, once a day is just fine.
Once it’s “ready” and if you have access to a fridge, you can pop the starter in the fridge and reduce the feedings to about once a week, just take it out and let it come to room temp before you use it.
We don’t change our routine based on the calendar – only on how the starter behaves.

You Don’t Need “Peak Starter” for Everything
A lot of sourdough advice insists on using starter at a very specific moment. In practice — especially when traveling — that’s not always realistic.
We’ve found that:
- Slightly underactive starter still works for longer, slower bakes
- Slightly overactive starter still works for stovetop recipes
- Consistency matters more than perfect timing
If the starter smells good and shows bubbles, we use it.
What We Use Our Starter For
Once the starter is ready, we start with forgiving recipes that don’t require special equipment or precise timing – the kind that fit slow travel and ill equipped kitchens.
Sourdough English Muffins
This is one of my favorite ways to use a sourdough starter.
- No oven required
- Cooked on the stovetop
- Easy to scale up or down
They’re practical in small kitchens and forgiving if the starter isn’t at its peak.
(Sourdough English Muffins Recipe — coming soon)
No-Knead Sourdough Bread (Dutch Oven or Stock Pot)
When we know we’ll be “home” most of the day, wherever that is at the time, this is our go-to loaf.
- No kneading
- Long, slow rise
- Baked in a Dutch oven or any heavy stock pot with a lid
This method works well even if the starter is mildly underactive, because time does most of the work. It’s also ideal for short-term rental kitchens where mixers and proofing baskets aren’t happening.
(No-Knead Sourdough Bread Recipe — coming soon)
Maintaining a Mini Sourdough Starter While Living Abroad
How we handle ours depends on what life looks like that week.
- At room temperature: discard and feed daily
- In the refrigerator: feed about once a week
No matter where it lives, we always adjust the water so it comes back to a thick paste after feeding.

How to Dehydrate Your Sourdough Starter for Travel Days
Drying the starter is what makes sourdough workable for travelers. It lets you pause everything and carry it safely from one destination to the next.
When to Dehydrate
- Pick a day when the starter looks healthy and active
- Dehydrate after feeding, once it has started to bubble
Dehydration Method (No Special Equipment)
- Feed your starter as usual.
- Spoon it onto parchment paper on a plate or tray.
- Spread it very thin.
- Leave it uncovered in a clean, dry place.
Avoid direct sunlight. Airflow helps, but we don’t aim a fan directly at it. Drying time can range from one to three days, depending on humidity.
How to Know It’s Fully Dry
It should be:
- Completely brittle
- Easy to snap
- Free of soft or leathery spots
If it bends, it’s not done yet.
Storage for Travel
- Break the dried starter into flakes or shards.
- Store in a small airtight container or zip-top bag.
- Keep it dry and away from heat.
Properly dried starter can last for months.
How to Reconstitute Your Starter
Plan on two to four days to bring it fully back to life.
Day 1: Rehydrate
- Place a small amount of dried starter in a clean jar.
- Add just enough water to cover it.
- Let it sit until softened, then stir.
- Add one soup spoon of flour.
- Adjust with water until you reach a thick paste.
Loosely cover and leave it at room temperature.
Days 2–3: Back to the Regular Routine
From here on, follow the same daily routine you used when first building the starter.
Traveling With Dehydrated Sourdough Starter (Border Questions)
This is something I thought about a lot before carrying starter across borders.
Most of the time, no one cares — but be prepared to explain it if asked.
We keep it simple:
- Declare it if there’s a food or agriculture question
- Explain plainly if asked
“It’s a small amount of fully dehydrated sourdough starter for personal baking.”
Label it clearly, carry a small amount, and be prepared to let it go if needed. It’s easy to replace.
A Note for Slow Travelers
This is why sourdough still works for us, even when we’re moving often:
- Dehydrate before long travel days
- Carry it dry, not active
- Label the container if you’re crossing borders
A sourdough starter doesn’t need a permanent home. It just needs a little attention when you’re ready to bake again.
Sourdough FAQ
Can you travel with sourdough starter?
Yes
How long does dehydrated sourdough starter last?
Months if dried and stored properly
Can you use sourdough discard safely?
See above
Do you need a scale to make sourdough starter?
Nope!
Why does my starter sometimes have hooch or smell strong?
A thin, liquid layer on top (called hooch) or a strong tangy smell is a starter’s way of saying it’s hungry or a little tired. Stirring the hooch back in and feeding as normal usually gets things going again. Strong smells are normal early on; only worry if you see mold or unusual colors.
Did I kill my sourdough starter?
Almost never. Sourdough starter is surprisingly resilient. If you haven’t seen mold or strange colors (pink, orange, fuzzy patches), your starter is usually just dormant – not dead.
Forgetting to feed it for a few days usually won’t kill it; a few consistent feedings will often bring it back to life.
True death usually comes from visible mold or contamination, not neglect.
What if I forgot to feed my sourdough starter?
Missing a feeding isn’t ideal, but it’s usually not the end of the world — especially with a small starter like ours. If you leave it longer between feedings, it might become sluggish and a little more acidic, but it can often bounce back after a couple of regular feedings. If it gets an unusual smell or shows mold, that’s when you’d consider restarting.
My starter gets lots of small bubbles but doesn’t really rise – is that OK?
Yes. It’s common for a starter to show lots of small bubbles without a dramatic rise, especially early on or if it’s on the thinner side. Bubbles are a good sign – they mean yeast activity – but visible rise also depends on things like flour type, temperature, and hydration. A wetter or cooler starter might bubble without gaining much height, and that doesn’t automatically mean it’s unhealthy.
Why doesn’t my starter double in size every time?
Doubling is a nice milestone, but not every starter – especially a new mini starter – will display dramatic rise every time. Temperature, flour mix, and hydration all affect how “tall” your starter gets. As long as it’s consistently bubbly and springs back after feeding, it’s doing its job
How do I tell when my starter is really ready to bake with?
There are lots of guides that suggest sky-high expectations, but for everyday baking with our mini starter we look for simple signs:
> Reliable bubbling throughout
> Noticeable rise after feeding (not always double, but clearly upward)
> A clean, pleasant sour smell
If your starter is consistently doing those things, it’s usually ready for pancakes, muffins, or bread – even if it’s not textbook perfect.